
#1 Getting Started
I've heard a few people have had trouble building certain buildings such as a house or tower. Well this blog post will explain how to build an elegant good looking Roblox house.
The first thing you want to do, is to get a good picture in your head of what you want your house to look like. Because trust me, there's nothing worse than having spent ages on a house then you realised you built the wrong layout to what you wanted, or you go off course.
Some people may find it easier if they draw a simple plan of what they want their house to look like, before they actually start. Here's an example of a simple house layout.

So as you can see in my layout above, I've stated the following.
- What floor is it on?
- What main objects are in each room?
- Where are the doors and windows?
- Labelled everything
It's simply up to you how you design your layout, but remember the more detailed, the easier it will be when it comes to the detailed building!
#2 Building The Basics, Walls, Windows and doors.
Build with block meshes and smooth studs. For a more quality feel. If your using bricks with a material other than plastic, then just smooth out all the sides before you start building. As shown in the following picture.

If your using plastic then you might as well insert a block mesh into brick, so in all the plastic parts, you won't see the grove in between the bricks. This comes in very handy to make your house higher quality and look more advanced.
This part you really need to focus on, because when you start it's best to do the simple bits first, the walls, windows and doors. Make sure all of the walls are to scale and that they are high enough for Robloxians to fit under. I recommend having the wall 10 studs high, per floor. This way you'll have enough space to fit all your furniture and utilities in.
The Windows should be transparent for a more realistic feel, I recommend 0.6 transparency with a light shade of blue. Maybe add some reflectance as well. If your an advanced builder, you may want to c-frame on some cool window frames or have different, cool styles of windows. However if your a beginner then stick to something simple.
Here are some examples of windows.
Beginner Window:


Advanced Window:
Okay so now you've decided what window style you want. You need to add the doors in. Depending on your skill level. If your a beginner then a brick with non- CanCollide with a mini handle is fine. But if your an advanced builder then you can do a door with a hinge. Samacado made a great realistic door that everyone can use. Here's the link to it:
#3 Adding Furniture and Utilities
This part is probobly one of the most fun parts, because the furniture can be fun to make. Try to avoid using free models and spend time making detailed, nice furniture.
Again an important thing with this is scaling it right. You don't want to have a chair that's twice as big as your table. Make it realistic and all to a realistic scale. E.g Coffee table hight = 3 studs. Width = 4 studs.
Making seats can be quite tricky to some people, mainly because they don't know how to choose which way the character sits. Surprisingly to them, it's simple! Just follow these steps!
#1: Make the seat un-anchored
#2:View the properties then scroll down (in studio) to the surfaces, and change the Front Surface to motor via the drop down window.
#3: now wherever the yellow circle is facing is where you character will face when you sit. So Put your seat into the right direction and build around it.
#4: Weld the bottom surface of the seat to a brick and change the motor back to smooth.
And there you have it!
Now that you've had these tips for Furniture you can now go ahead and spend time creating it, then come back to here when your done.
#4 Adding More Floors
This can be VERY tricky for beginners, but if you pay attention you'll get the hang of it.
Again it's good to do a plan for every floor that you do, like the example I showed you. So take that in mind before you start this.
Make sure you've done EVERYTHING that you want to do to the floor below BEFORE you add another floor on top.
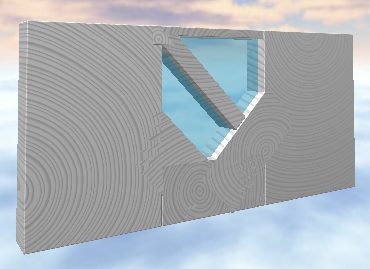
Now you can add a brick above all the walls, but this time. Make a hole so you can build stairs there. As shown in this picture.

After this is done you can then build you stairs to how you desire. Advanced builders may with to use c-framed spiral stairs. But beginners can use simple stairs like this:

You may wish to add railings around the edge for more detail and quality but all that is up to you! Now just follow your plan, using all the tips I've given you.
#5 Adding Roof
After you've finished interior of your house. It's good to build a nice roof using wedges. To get a in studio. Click Insert > Object > Wedge Part. Then anchor it and adjust it to suit your house.
Here's an example of a advanced finished house!

And We're done! I hope this tutorial helped you and I look forward to seeing some awesome houses!
I may be holding a house building contest soon so get building!
Thanks!

Follow me on twitter!
A great tutorial.
ReplyDeleteThis has helped me. Thank you alot.
ReplyDeleteI'm a Advanced builder, but I wouldn't know how to build a house like this!
ReplyDeletegreat this blog is really useful
ReplyDelete:D Thanks
ReplyDeleteThough I knew this already, I enjoyed reading it. Great work, and keep up this amazing fan site.
ReplyDelete